Sugar-free popsicles are frozen pops with almost no sugar per serving, and you can buy them or make them in a blender in about ten minutes. The catch is the wording on the box: “sugar-free” and “no added sugar” are two different claims. Below you will find how to read each one, a base recipe for homemade fruit pops, ways to fix texture without sugar, and notes on sweeteners, diabetes and kids.
Key Takeaways
In the United States, “sugar-free” means less than 0.5 g of sugars per serving, while “no added sugar” only describes how the product was made.
Homemade pops need just three things: fruit, a liquid and, if you like, a sweetener. Freeze for at least 6 hours.
Water keeps pops lean, coconut milk makes them creamy, and smooth blending prevents an icy bite.
If you use sweeteners, start small and keep to the amounts you would normally eat in a day.
People managing diabetes should check the carbohydrates per pop, not just the sugar line.
Table of Contents
Are Sugar-Free Popsicles Really Sugar-Free?
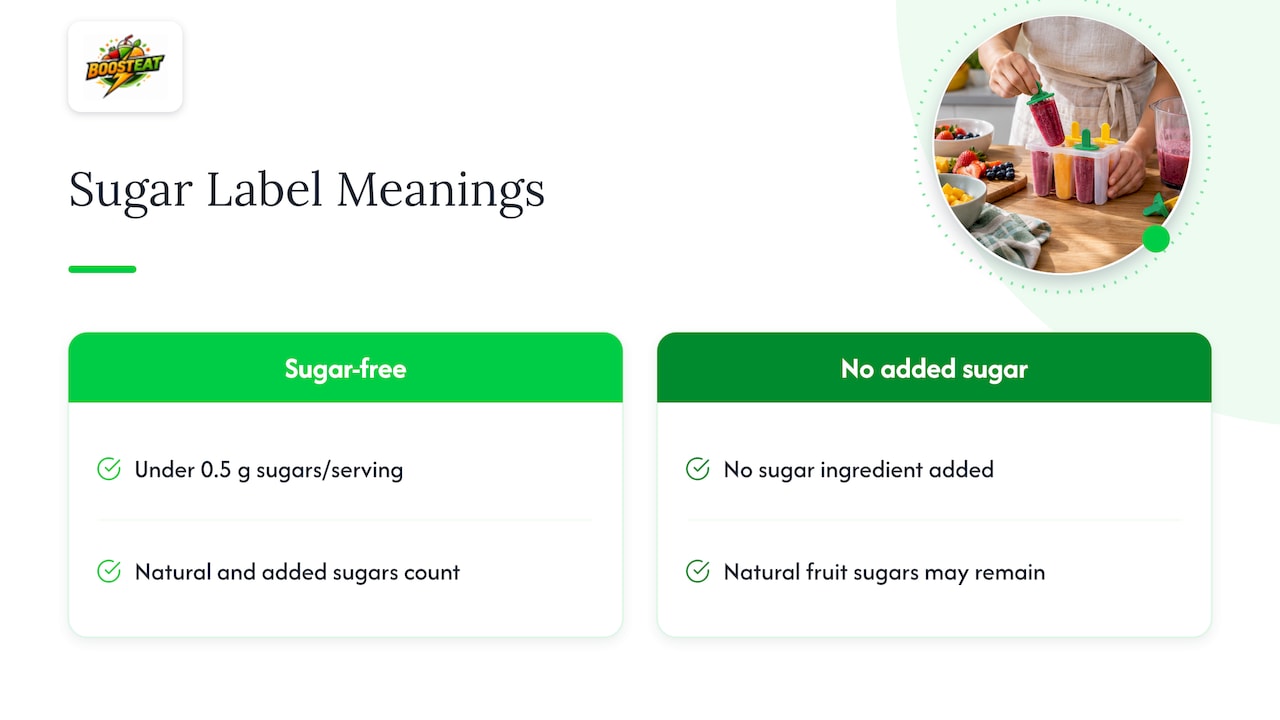
Usually close to it, but not always literally zero. In the United States, “sugar-free” means one serving has less than 0.5 g of sugars, both natural and added, according to the American Heart Association. The FDA treats it the same way: a quantitative nutrient-content claim tied to the reference amount and labeled serving (21 CFR 101.60©). So a pop with 0.4 g of sugars can carry the claim, and a few of them in a row add up.
“No added sugar” is a different statement. It means no sugar or sugar-containing ingredient was added during processing or packaging. A pop made only from fruit and juice can use that label and still contain a fair amount of natural fruit sugar. That is not bad, it is simply a different product.
Rules change by country. The European Union, for example, allows “sugar-free” at no more than 0.5 g of sugars per 100 g or 100 ml, so a label read abroad does not always mean what it means at a US grocery store.
How to Read the Label in 30 Seconds
Look at Total Sugars and Added Sugars on the Nutrition Facts panel, per pop.
Check the serving size. Some boxes list one pop, others list two.
Scan the ingredients for sweeteners and sugar alcohols if you are sensitive to them.
Check Total Carbohydrate if you count carbs.
Store-Bought vs. Homemade Pops
Shelf-stable convenience is the strength of boxed sugar-free pops: they sit in the freezer for the whole summer, and a typical one is a light, low-calorie treat. The flavors are often built on artificial or high-intensity sweeteners and flavorings.
Homemade pops give you control over three things: what sweetens them, how much fruit they hold, and what goes in the mold besides fruit. They are also the easiest way to serve kids a frozen treat made of real ingredients you can name.
| Boxed sugar-free pops | Homemade fruit pops | |
|---|---|---|
| Prep time | None | About 10 minutes plus freezing |
| Sugar per pop | Under 0.5 g when labeled sugar-free | Depends on fruit; near zero with low-sugar fruit and no juice |
| Sweetener | Chosen by the manufacturer | Chosen by you, or none |
| Flavor range | Fixed | Unlimited |
| Texture | Uniformly smooth or icy | Adjustable with creamy add-ins |
| Best for | Stocking the freezer | Kids, families, experimenting |
The Base Recipe for Homemade Sugar-Free Popsicles
This method works for nearly any fruit. Makes about 6 standard pops.
Ingredients
2 cups fresh or frozen berries (strawberries, raspberries or blueberries are the easiest)
1/2 to 3/4 cup cold water
1 tablespoon lemon juice
Optional: 1 to 2 tablespoons powdered sweetener of your choice, to taste
Steps
Add the fruit, water and lemon juice to a blender.
Blend on high until completely smooth. Add a splash more water if the blades stall.
Taste. Fruit that is slightly tart before freezing will taste milder once frozen, because cold dulls sweetness. Add sweetener in small amounts if you want it.
Pour into molds, leaving a little room at the top, as the mixture expands when it freezes.
Insert sticks and freeze for at least 6 hours, or overnight.
To release, run the mold under warm water for a few seconds and pull gently.
That is the whole idea: fruit, liquid, acid, optional sweetener. Everything else below is a variation.
Flavor Combinations That Work Without Added Sugar
Strawberry and basil: strawberries, a few basil leaves, lemon juice.
Watermelon and lime: about 3 cups cubed watermelon and the juice of one lime. It needs little or no water.
Raspberry and lemon: tart and bright, and it freezes with a pretty color.
Mango and pineapple: naturally sweet, so keep the portion small if you are limiting sugar.
Blueberry and mint: blueberries, water, a few mint leaves.
Cherry and vanilla: pitted cherries, water and a drop of vanilla extract.
Watermelon, berries and citrus are good starting points for a low-sugar pop. Mango, pineapple and ripe banana taste sweeter and carry more natural sugar, so they suit a “no added sugar” pop better than a near-zero one.
Fixing Texture Without Sugar
Sugar does more than sweeten. It lowers the freezing point, which is why regular pops stay softer. When you remove it, pops can turn rock-hard or icy. Four fixes help:
Blend longer. A very smooth puree freezes into smaller ice crystals and bites more cleanly.
Use less water. Watery fruit such as melon freezes icier, so concentrate flavor by using the fruit itself as the liquid.
Add fat. A few tablespoons of full-fat coconut milk or cream per batch make pops softer and creamier.
Add a powdered sweetener. It dissolves fully and keeps the texture from getting grainy.
Plain water keeps added sugar out entirely, while coconut water brings some natural sugar along. Choose based on your goal.
Creamy Pops for Kids
Blend 1 cup plain yogurt with 1 cup mashed ripe berries, then freeze. The yogurt makes a softer pop that is easier on small teeth. If you like frozen yogurt treats, our frozen yogurt bark uses the same idea in a flat, snackable form.
Sweeteners: What to Know Before You Add One
You do not need a sweetener at all if your fruit is ripe. Many families find that a pop made of strawberries, lemon and water is sweet enough on its own. If you do want one, a few facts help you use it sensibly.
Stevia (steviol glycosides): European regulators set an acceptable daily intake of 4 mg per kg of body weight, and noted that adults and children could exceed it if sweeteners were used at the maximum proposed levels. Using small amounts in a single batch keeps you well within a normal range.
Saccharin: the European Food Safety Authority’s 2024 re-evaluation set an ADI of 9 mg per kg of body weight per day, considered safe for all population groups.
Erythritol and other sugar alcohols: EFSA has noted that the laxative threshold may be exceeded, especially by young consumers when consumed in beverages. For children, that is a good reason to keep sugar-alcohol pops to one at a time.
Practical rule: sweeten lightly, taste, and let the fruit do most of the work. For young children, fruit-only pops are the simplest option.
Freezing Time and Storage
Most fruit pops need at least 6 hours to set solid, and overnight is safest, especially in a freezer that is opened often. Thicker, creamier mixtures can take a little longer than thin ones.
Once the pops are frozen solid, unmold them and slip each into its own freezer-safe bag, so they do not stick together and pick up freezer odors. Stored this way they keep for weeks and taste best within the first few weeks. If a pop sticks, a few seconds of warm water on the outside of the mold loosens it.
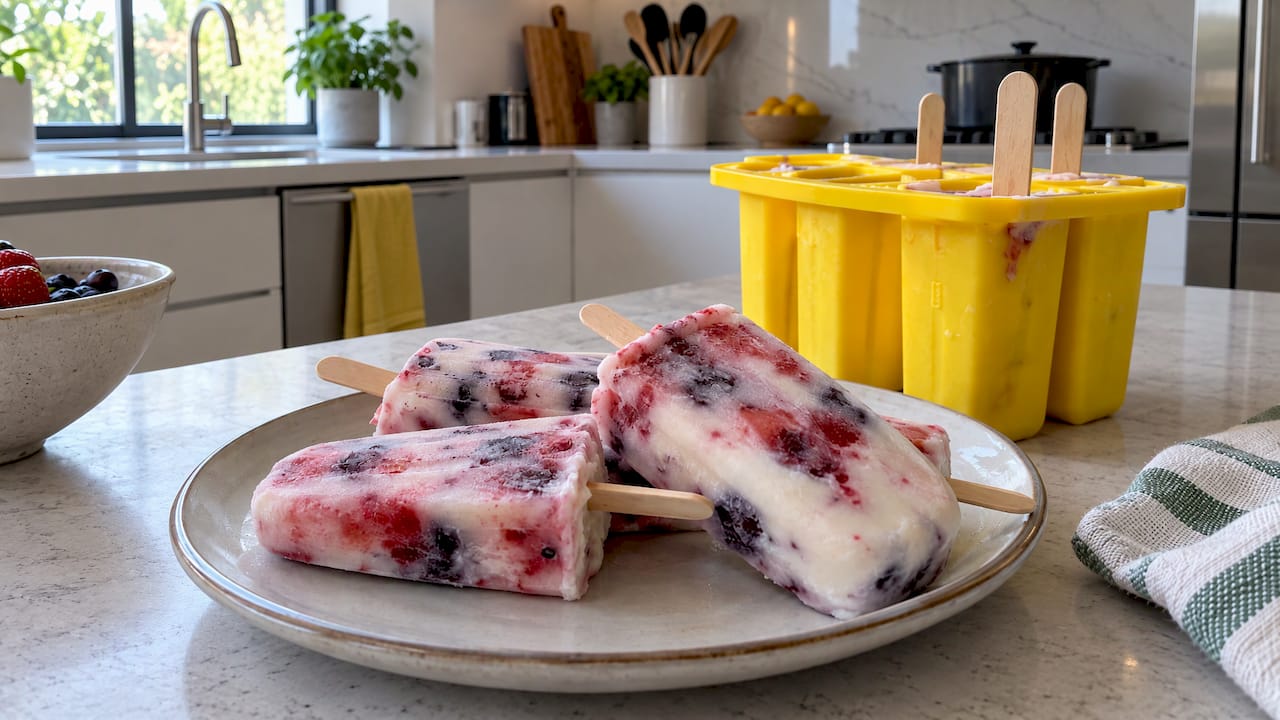
No molds? Use small paper cups with a wooden stick pushed in once the mixture is partly frozen, or freeze the puree in an ice cube tray with toothpicks for bite-size pops.
Sugar-Free Popsicles and Diabetes
A frozen sugar-free popsicle is classed as a low-carbohydrate snack, 5 grams or less in the American Diabetes Association’s snack guide. That makes it an easy fit for many meal plans, but check the carbohydrates on your particular pop, since homemade fruit versions vary with the fruit and the portion.
There is one case where the opposite applies. During illness, the ADA notes that regular popsicles can help keep blood glucose up if a person with diabetes is at risk for lows. If that is your situation, ask your doctor or diabetes care team which sick-day foods fit your plan.
Are Sugar-Free Pops a Good Choice for Kids?
They can be a good one when the pop is built on real fruit. The ADA’s snack planning guidance suggests building snacks around vegetables, fruits, whole grains and healthy fats, and using measuring cups and spoons to control portions. A fruit pop fits the first of those, and a yogurt or coconut-milk version adds some fat and protein.
To make pops more filling for children:
Blend in a handful of spinach. In a berry pop, the color hides it.
Add plain yogurt for protein.
Use small molds, so portions stay modest.
Freeze leftover smoothie. Our vegetable smoothie tips work well for this, since any smoothie you can pour you can freeze.
Where Pops Fit With Other Sugar-Free Snacks
Pops are best as a summer treat, but the same fruit-first approach carries over to the rest of the year. Spread homemade sugar-free jam on toast, pack no-bake energy balls for the lunchbox, or prepare overnight oats for busy mornings. A freezer drawer with pops, bark and frozen fruit is a good base for quick, healthy snacks.
Our Perspective
We built Boost Eat around a simple belief: healthy eating sticks when it is easy, flavorful and flexible. Sugar-free popsicles are a good example. You do not need a special product or a long ingredient list. You need ripe fruit, a blender and a mold.
What we like about homemade pops is that they adapt to the person eating them. A vegan family can use coconut milk, a gluten-free household has nothing to worry about, and a parent who wants zero sweeteners can leave them out. The same base recipe becomes a smoothie, a pop or a bark depending on the day.
Our advice is to start with fruit-only pops, taste them, and add anything extra only if you miss it. Keep a few in the freezer, and a sweet craving no longer needs a store run.
Simos – Boost-eat.com Founder
Want More Ideas Like This?
If you like recipes you can make in minutes, Boost Eat Member’s Kitchen gives you a place to keep exploring healthy smoothies, snacks, desserts and Greek dishes. It will be ready very soon so you can subscribe and get updates! You can read about it on the Member’s Kitchen page.
You can also browse free recipes any time on the Boost Eat homepage.
FAQ
Are sugar-free popsicles actually sugar-free?
Usually nearly, not always completely. In the US a product can say “sugar-free” if one serving has less than 0.5 g of sugars. Check the Nutrition Facts for total and added sugars per pop, and the serving size.
What is the healthiest popsicle to eat?
One made mostly from whole fruit, with no added sugar and little or no sweetener. Homemade pops from berries, lemon and water are a good example, and yogurt-based pops add some protein. Compare the label’s total carbohydrates and sugars if you buy them.
Can a diabetic eat sugar-free popsicles?
Often yes. The ADA lists a frozen sugar-free popsicle as a low-carbohydrate snack of 5 grams or less. Check the carbohydrates on your specific pop, and talk to your care team about what fits your plan.
How do I make sugar-free popsicles that are not icy?
Blend the fruit until completely smooth, use as little water as you can, and add a few tablespoons of coconut milk or yogurt. A powdered sweetener, if you use one, dissolves evenly and helps the texture.
How long do homemade sugar-free popsicles last?
Freeze at least 6 hours, then store each pop in its own freezer-safe bag. They keep for weeks and taste best in the first few weeks.
Sources
What’s the Difference Between Sugar Free and No Added Sugar? (American Heart Association)
Sugars and Sweeteners (Knowledge4Policy, European Commission)
Best Foods For You: Healthy Snack Choices (American Diabetes Association)
Diabetes and Planning for Sick Days (American Diabetes Association)
Recommended
General Entertainment & Information Purposes Only. At Boost-Eat.com and our partners we share content for general entertainment and information. It’s not medical, dermatological, nutritional, or fitness advice and shouldn’t replace guidance from a licensed professional. If you’re making health-related decisions, please check with a qualified expert — and know that using this site and its information is at your own discretion.
Discover more from BOOST EAT
Subscribe to get the latest posts sent to your email.

